1.AdTiming Mediation SDK
AdTiming offers diversified monetization features, currently supporting Native Ad, Interstitial Ad,
Banner Ad, Rewarded Video Ad and interactive Ad. Access ads inventories from multiple mainstream Ad
Networks through the AdTiming mediation SDK now.
The SDK supports both Android and iOS, with a Unity Plugin to facilitate Unity apps integration.
Android Operating Systems Version 4.1 (API Level 16+) and above are supported. On the iOS side,
version 9 and above are supported. As for the Unity Plugin, use version 4.6.8 and above.
The Unity Plugin should not be used alone. Instead, it should work along with the AdTiming SDK for
either the Android or iOS platform. Import the plugin into your project in the Unity Editor, and
target either an Android or iOS build to test the integration.
The AdTiming SDK comes in the form of a core library plus adapters library each for each 3rd-party
Ad Network you'd like to work with through mediation. The adapter interacts with the 3rd-party Ad
Network's SDK which you'll also need to fully access its inventory. This architecture allows for
maximum flexibility and minimal footprint.
Usually we offer two types of library download options: Maven/Cocoapods repository or manual zip
download. For better build experience, we recommend Gradle for Android and CocoaPods for iOS.
Unity-wise, build in the Unity Editor with Gradle when targeting Android; or export to Xcode and
build with CocoaPods when targeting iOS.
The repository way is preferred and assumed in the following sections. See our
Help Center for the other
option.
2.Integrating AdTiming Mediation SDK into your app
Let's dive into how to integrate the AdTiming Mediation SDK into your app. We'll first show you the
6 steps it takes to make your app work with AdTiming as your sole inventory, then we'll tell you how
to add more 3rd-party Ad Networks into the mediation mix.
The 6 steps are:
a) Acquire AdTiming platform credentials
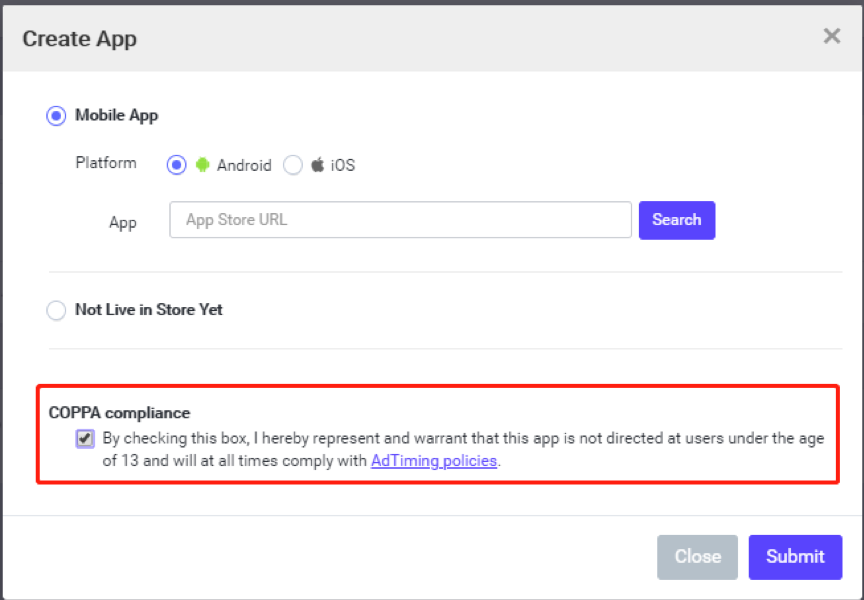
Create an account on https://publisher.adtiming.com and add your app:
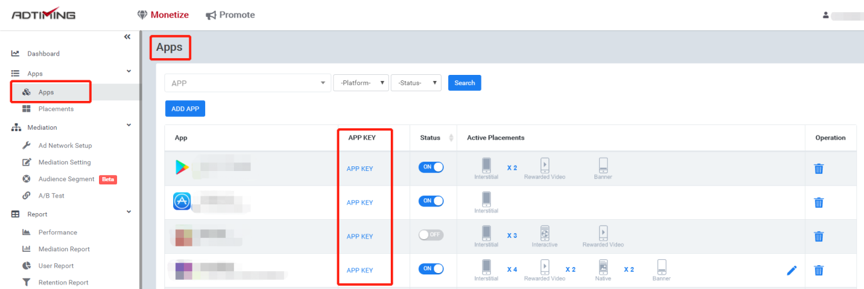
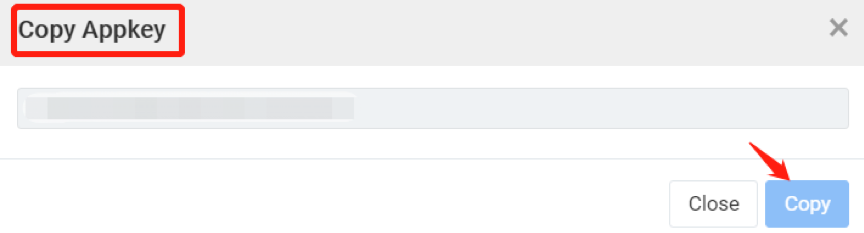
The AppKey is your app's unique identifier on AdTming:
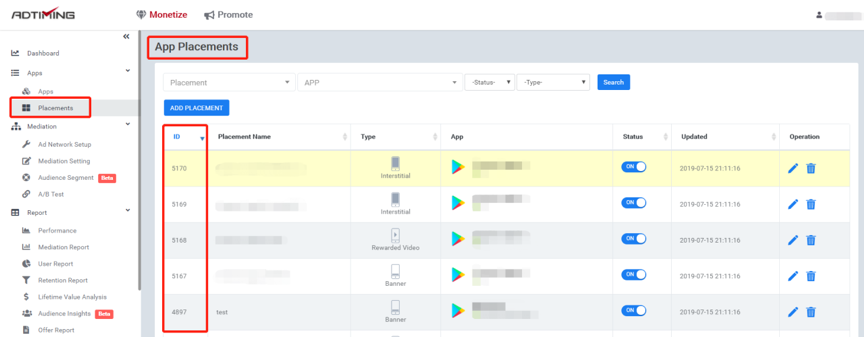
Create app placements as many as you need, with each being one of the five types: Native,
Interstitial, Rewarded Video, Interactive, Banner. For each Interstitial, Rewarded Video and
Interactive placement, one or more Scenes can be configured so that it can be triggered in your app
with SceneNames, while a Native or Banner ad is referenced by its PlacementID.
 b) Add the AdTiming SDK to your project
Android
b) Add the AdTiming SDK to your project
Android
Add to your Android app's build.gradle file inside repositories and dependencies section:
repositories {
maven {
url
"https://dl.adtiming.com/android-sdk"
}
}
dependencies {
implementation 'com.aiming.mdt:adtimingsdk:'
}
Add the following permissions to your AndroidManifest.xml file inside the
manifest tag but outside the <application>
<uses-permission android:name="android.permission.INTERNET" />
<uses-permission android:name="android.permission.ACCESS_NETWORK_STATE" />
IOS
Enter the following line in your iOS app's podfile:
pod 'ADTiming','3.6.9'
Add '–ObjC' to
Target ➣ Build Settings ➣ Linking ➣ Other Linker Flags.
In your info.plist add a dictionary called 'NSAppTransportSecurity' on the 'Top
Level Key'. Inside this dictionary, add a Boolean called 'NSAllowsArbitraryLoads'
and set it to YES.
c) SDK initialization
Now it's time to get the SDK initialized. Use your AppKey to call the SDK's init() method after your
app starts. In Android, the best place to call is within the onCreate() event of an Activity, while
in iOS some system functions like didFinishLaunchingWithOptions() that get called right after the
app starts will do.
d) GDPR & COPPA compliance
AdTiming fully complies with IAB Europe's Mobile In-App CMP API v1.0: Transparency & Consent
Framework. Integrate a Consent Management Platform (CMP) in your app and store the collected end
user's consent information in PreferenceManager.getDefaultSharedPreferences.
To protect children, AdTiming does not advertise for users under the age of 13. You have to agree to
the COPPA compliance option when you create your app.
 e) Configure Ad Units
So far we are all set to get your app ready for its first Ad unit. In general, there are 4 necessary
steps for all five types of ads, although some may be optional on either Android or iOS.
● Step 1: Init an Ad Object and register callbacks
The AdTiming SDK fires several events to inform you of Ad activity. So first of all, you need to
create a brand new Ad object for a PlacementID, set up its Listener/Delegate to receive ad events.
Take Rewarded Video on Android for example, implement the following callbacks in the
RewardedVideoListener interface to let your application respond to the corresponding events:
onRewardedVideoAvailabilityChanged()
onRewardedVideoAdShowed()
onRewardedVideoAdShowFailed()
onRewardedVideoAdClicked()
onRewardedVideoAdClosed()
onRewardedVideoAdStarted()
onRewardedVideoAdEnded()
onRewardedVideoAdEnded()
● Step 2: Load an Ad
This is pretty straightforward. Call your Ad Object's loadAd() method to request and cache the Ad
before it is ready to be shown to the user. The loading time depends on the size of the Ad as well
as your network connectivity. Give it enough time buffer to be on the safe side.
The latest SDK release can automatically load Rewarded Video, Interstitial and Interactive ads now,
so this step is no longer mandatory. For Banner and Native ads, of course, you still need to
manually load them.
● Step 3: Show an Ad
Before calling your Ad Object's showAd(), let's check if the Ad is ready. Remember the onAdReady()
callback in Step 1? You get notified of the Ad's readiness through it by the SDK. Another way is by
calling the Ad Object's isReady() method whenever you want to make sure of its preparedness. The
best practice is to always make sure isReady() returns True:
if (AdTimingRewardedVideo.isReady()) {
AdTimingRewardedVideo.showAd(“scene name”);
}
For Interstitial, Rewarded Video and Interactive ads, you need to pass a previously configured
SceneName parameter to the showAd() method to trigger the corresponding placement, or simply ignore
the parameter if you didn’t configure any. For detailed usage information about Scene, please see
our Help Center.
● Step 4: Destroy an Ad(Banner and Native only)
On Android it is recommended to call the Ad Object's destroy() method in the Activity's onDestroy()
callback to release the Ad object when the Activity is about to be destroyed.
@Override
public void onDestroy() {
if (bannerAd!= null) {
bannerAd.destroy();
}
super.onDestroy();
}
Repeat these 4 steps for all the ad units in your app.
f) Test your integration in 'Test Mode'
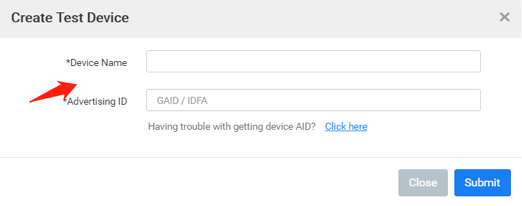
All right. Let's make sure the integration works. First, go to https://publisher.adtiming.com and
add your device as a Test Device:

Then turn on the Test Mode, which stays on for an hour before you turn it on again, to receive test
campaigns:
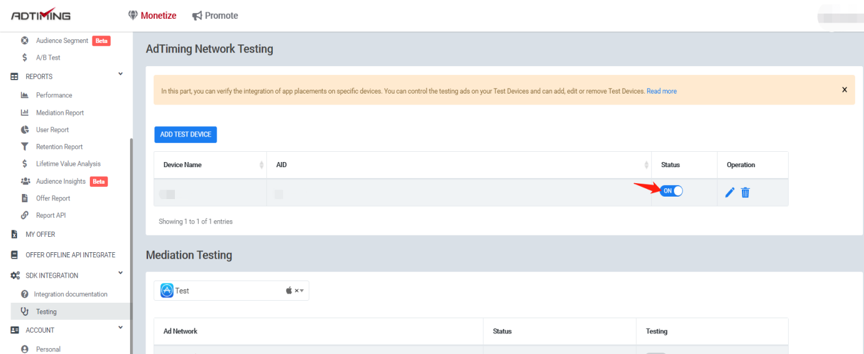
Congratulations! You've done it! Your app is now ready for AdTiming's live ad inventory!